
The AC in the Carrera never worked very well. I tried installing a high efficiency evaporator in the tail with no improvement and in the nose with slight improvement. Lastly, I looked to a fender mounted condenser.
There are a few good articles about mounting condensers in the rear fenders. Although this has been shown to be successful, I question the airflow you get over the condenser in that arrangement and I also do not like the fact that the condenser is in the debris field from the rear tire.
The 964/993 cars placed the condenser forward of the front wheel. Although the body shape is a bit different, it looked possible to do the same with my car and without cutting the body. Although I bought a used condenser on Ebay, Pelican sells new 964/993 condensers for ~$100.
To get the needed room, the stock windshield washer bottle needs to be relocated (see my other article) and the valance support bracket must be removed/ modified. With those gone, there appears to be sufficient space for a ~12x12in condenser. Of course, the stock 964/993 condenser shroud and fan will need to be replaced.
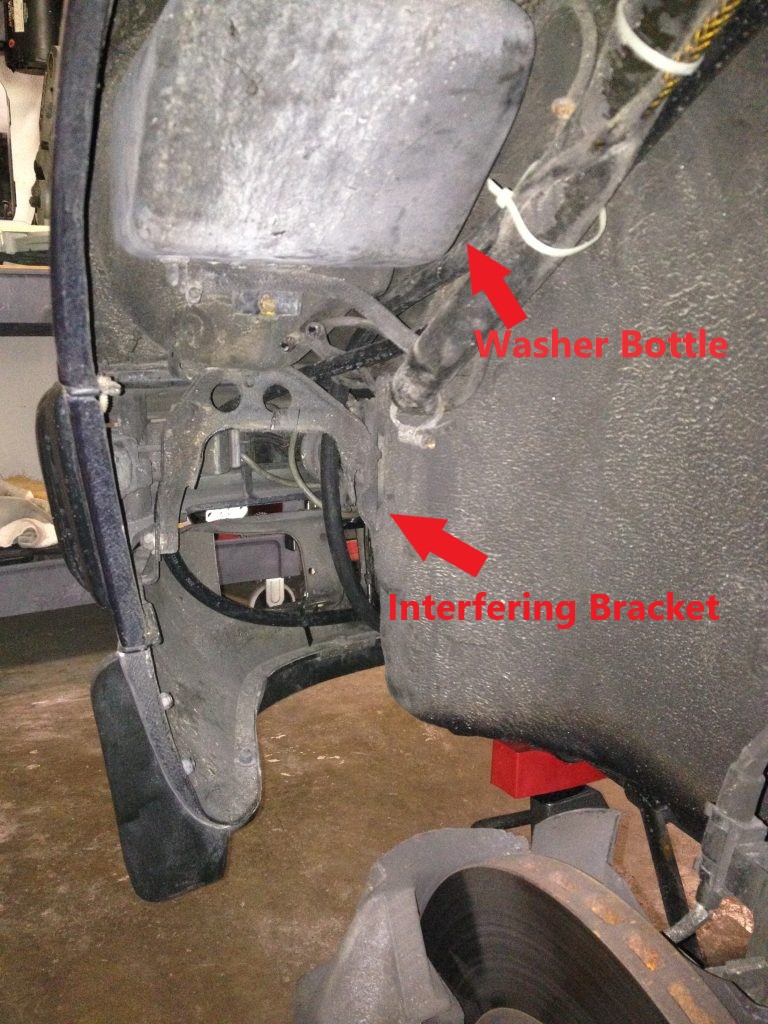
I trial fit the condenser to check clearances and determined that I would have to cut the fog light bracket. Although I had wanted to do this without cutting, I deemed this to be a small and easily reversible modification.
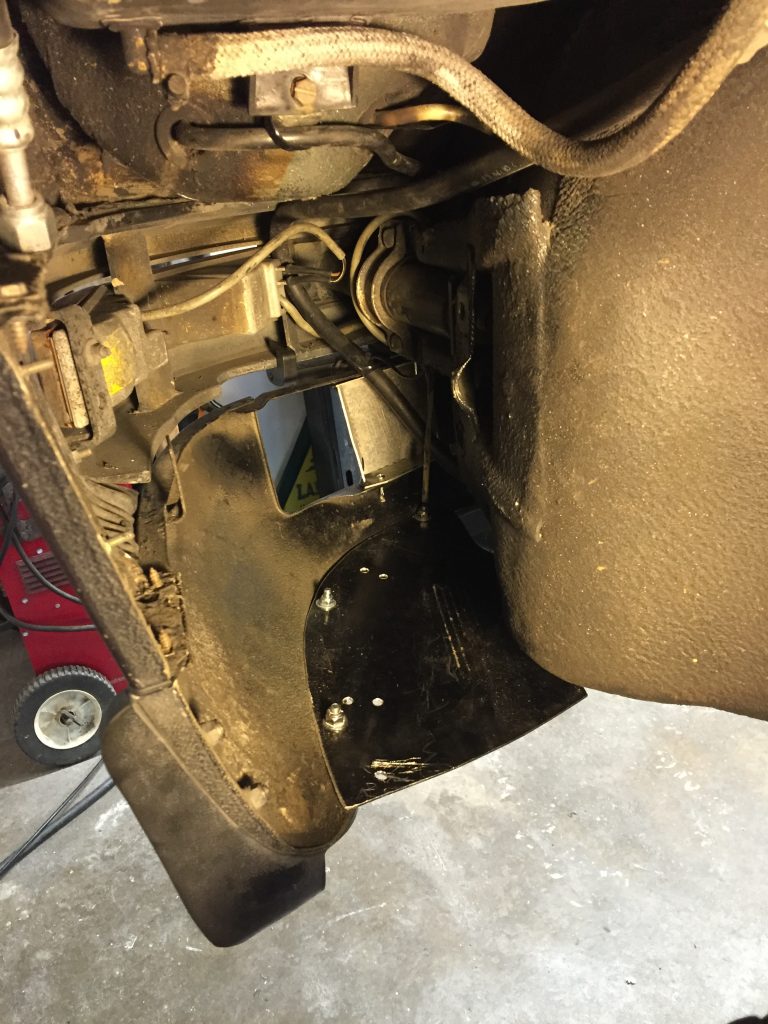
With the bracket cut, there is adequate room to fit the condenser and an 11 inch fan (SPAL or equivalent, thin profile fan).
I had previously removed the fog lights because I didn’t use them, wanted more cooling to the oil cooler, needed a good place to mount my Passport laser detectors and some nominal weight reduction. With the placement of the condenser, the fog light hole would also allow a good amount of passive air flow while driving.
To insure all of that air passes through the condenser, I fabricated a custom shroud using ABS plastic and aluminum plate. I also fabricated a couple support brackets: one to the headlight bucket and one to the shield I attached to the valance.

Lastly, I fabricated a plate to block/redirect air flowing through the fog light hole and a plate to keep the air from spilling out the bottom.
I had previously replaced all of my AC hoses with reduced diameter barrier hoses from Rennaire. The hose that came from the rear deck condenser to the front condenser can be shifted to connect the compressor to the fender condenser. A new hose is required to connect the fender condenser to the front condenser. I purchased this custom hose (27in, #6 hose, one end straight #6, and the other end 90deg #6-#8) from Cold Hose. The remaining lines connecting the front condenser, evaporator, receiver/ drier and compressor are unchanged.
Everything was then painted and bolted in place.
An important comment on the controls. You should be able to use the stock center console location or, as I originally planned, move the AC controls box up under the ashtray and delete the center console (see other article). This worked well until I purchased a new thermostat which was too tall to fit into the stock box. As a temporary solution, I fabricated a new box using some ABS sheet and PVC glue. Later, I 3D printed a new control housing.

Replace the drier/ accumulator, pull a vacuum and then recharge the system. Enjoy your AC with less weight in the rear of the car. For the first time since I have owned the car, I got cold air blowing strong from the vents. Awesome! Especially in Houston during the summer.
Additional benefits of removing the rear deck condenser is that it may also allow for cooler engine intake temperatures and provide more clearance for intercoolers.
Final note: By the time I was finished, I had the fender condenser, a Kuehl front serpentine condenser and a new Rennaire evaporator. The system will blow <40F air even in a Houston summer. Was it one component that made the difference or all of them? I am not sure but am happy with the results.